Supplies Needed
cupcakes:
icing: delicious icing recipe here (I use a little bit of cream cheese to cut the sweetness)
Wilton no taste food colouring - red, yellow, blue, green
white chocolate wafers (candy melts) - two per cupcake
chocolate icing for pupils
light blue icing (small amount)
light pink icing (small amount)
chocolate chips
orange peanut M&Ms
Oreo cookies
mini chocolate chip cookies - one for each Cookie Monster
marshmallows - one per Big Bird cupcake
red fruit roll up
star tip
leaf tip (optional but awesome for Big Bird's feathers)
round tip
icing bags (make your own like I do - see tutorial here)
Pipe red icing onto the cupcake using a star tip.
Break apart some Oreo cookies, remove the icing (eat it!) and split them in half. One Oreo goes a long way - in case math isn't your strong suit, one Oreo makes 4 smiles! Place the Oreo smile near the bottom of the cupcake.
Add two white chocolate wafers (sometimes also called candy melts) which are basically pieces of white chocolate that look like Elmo eyes. Place them protruding slightly off the top and make sure they're touching.
Using a small round tip, pipe chocolate icing on Elmo's eyes - for the most realistic eyes, make sure to pipe the pupils in the centre and slightly cross-eyed.
Then place an orange peanut M&M in between the eyes. If you have peanut allergies, other options would be orange jelly beans or other orange coloured candies. And yes, I totally picked through our local grocery store's bulk bin section, only taking the orange ones!
And voila! Elmo!

Pipe blue icing onto the cupcake using a star tip.
Place white chocolate wafers (candy melts) at the top of Cookie Monster's head
Then shove a mini chocolate chip cookie into Cookie Monster's "mouth area".
Using a round tip, pipe chocolate icing onto the white chocolate wafers, making sure the pupil is at the bottom right "corner" for the left eye, and the top left "corner" for the right eye.
And voila! Cookie Monster!

Pipe green icing onto the cupcake using a star tip.
Break apart the Oreos, scrape off (and eat!) the icing, break the Oreos in half and shove the cookie right into Oscar's mouth area. You want him to look like he's grimacing, not smiling! I tried the upside down smile-turned-frown, but that just looked weird. We did this and it worked for me!
Also put the white chocolate wafers (aka candy melts) on for his eyes. Oscar's eyes are not on the top of his head like Elmo and Cookie Monster, so make sure to put them lower down, and make sure they are not touching each other. Perfectionist, anyone?!
I wasn't sure I'd have enough chocolate icing left to use for Oscar's unibrow, but Emma came up with a fantastic idea - use upside down mini chocolate chips! Stagger them close together to get that accurate bushy unibrow.
Pipe chocolate icing for the pupils - centred and not as cross-eyed as Elmo's.
And voila! Oscar the Grouch!

Note: Big Bird takes forever! Consider yourself warned.
Now, technically you could just pipe yellow icing on top of the cupcake like we did with the other characters, but not if you're wanting realistic looking feathers!
Now, technically you could just pipe yellow icing on top of the cupcake like we did with the other characters, but not if you're wanting realistic looking feathers!
So, first start by taking a large marshmallow and cutting a triangle off one end to make the beak shape. I also ended up trimming the bottom off slightly because it looked too tall. This also had the added benefit of exposing the sticky inside of the marshmallow, helping it to stick to the cupcake. You could also make it stick by applying icing in between the marshmallow and the cupcake, but I found that this was sufficient. Make sure to place the beak near the bottom of the cupcake to leave room for the eyes and for the proportions to look right.
Next, take some red fruit roll up (Fruit by the Foot) and put it on the inside of the marshmallow beak, trimming it to the right shape. I found I had to take the marshmallow off to do this well, but you might be able to do it with it on.
Next, slather some yellow icing on the outside of the beak and smooth it out as best you can with a knife dipped in warm water.
Using a leaf tip, pipe yellow icing on the cupcake in layers, starting with the outside and working your way in. Totally looks like feathers!!
Place the white chocolate wafers (aka candy melts) on top of the beak and have them slightly separated. Then, using a round tip, pipe light blue icing as the lower eyelid, light pink icing as the upper eyelid (both directly on top of the white chocolate wafer) and chocolate as the pupils, near the bottom of the eye and very slightly cross eyed.
And voila! Big Bird!

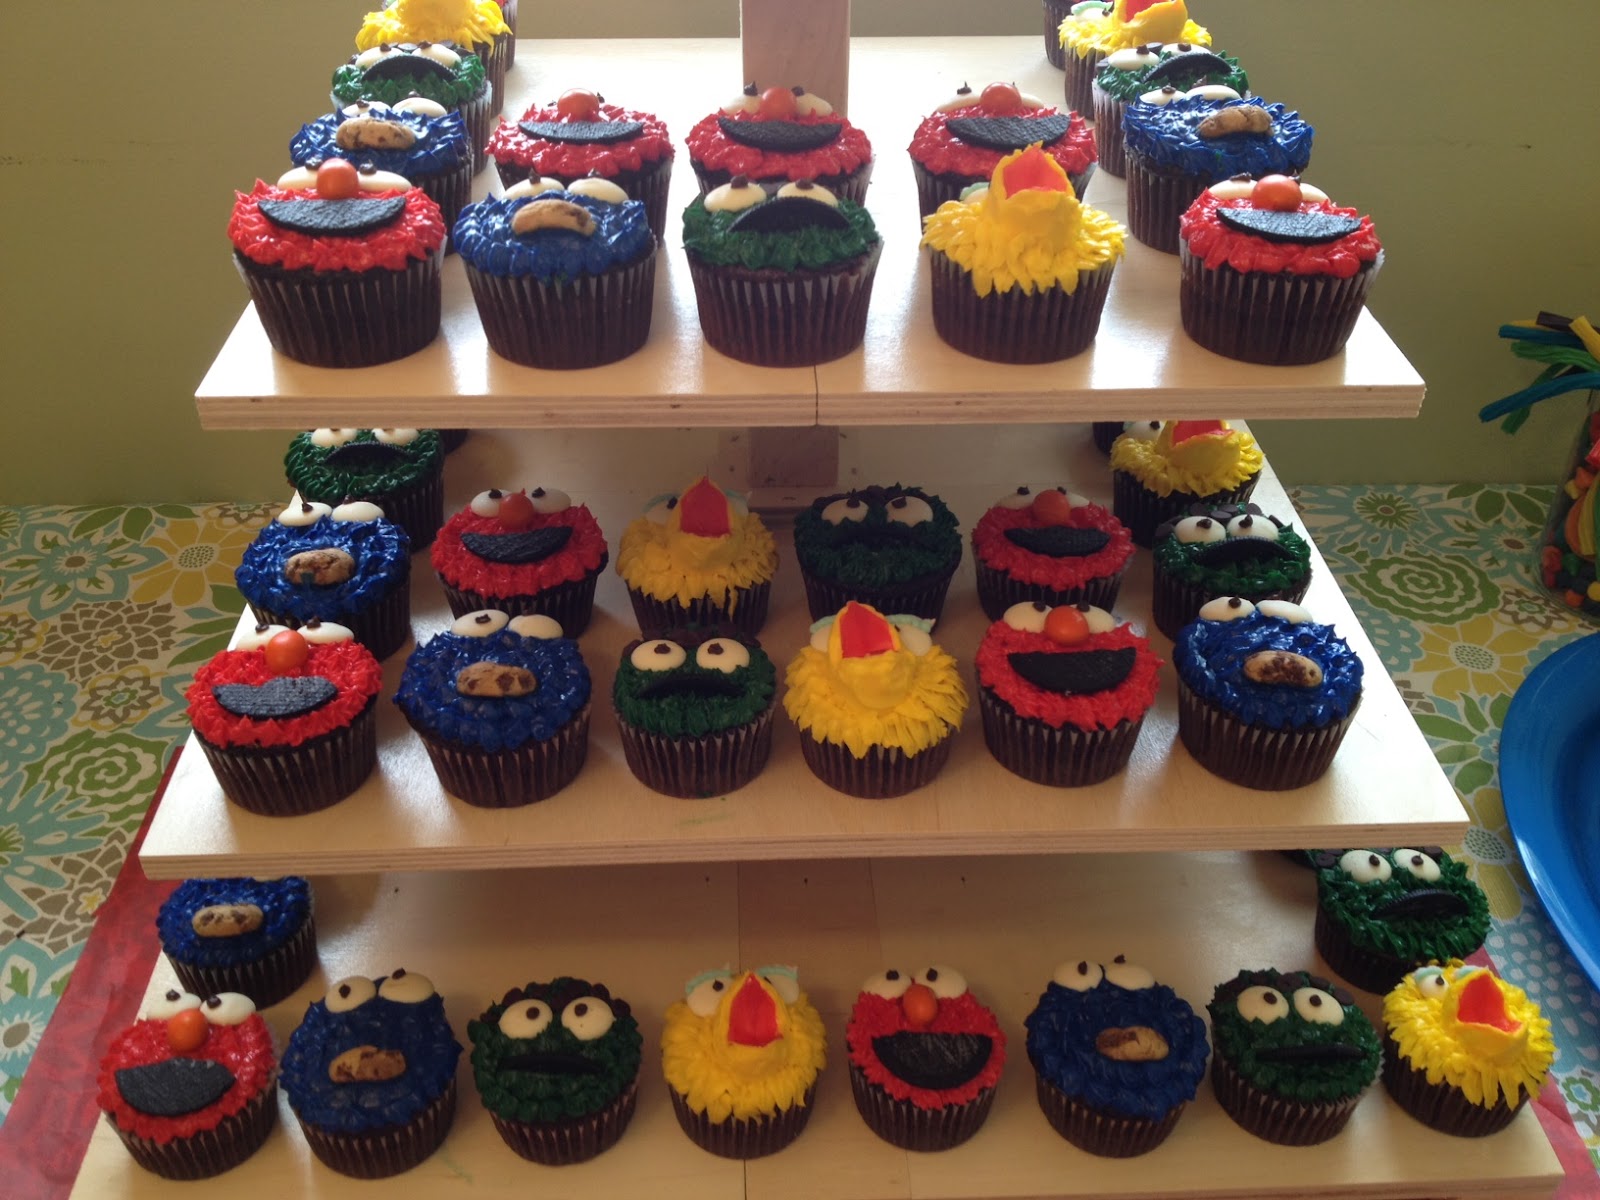
With that, may I present to you the Sesame Street Character Cupcakes - Elmo, Cookie Monster, Oscar the Grouch and Big Bird!


2 comments:
Awesome job! They look so great all together on the cake stand!!
Love. them. Great job!
Post a Comment